The buttons on the Wiimote obviously correspond to a boolean value. If the button is pushed down, its value becomes true. Likewise, if the button is left up, its value becomes false.
Being able to map the buttons of an input device to the buttons of an output device is done by typing and running:
[outputdevice].buttonname = [inputdevice].buttonname
When coding scripts which allow the Wiimote to work with PC applications, we typically will treat the keyboard as the output device and the Wiimote as the input device. Thus, if we want to output the letter 'a' on a text program using a Wiimote, we would write a line of script in GlovePIE that would look something like this:
keyboard.a = wiimote1.a*Note that wiimote1 represents the first Wiimote connected via bluetooth. Wiimote2 would represent the second, and so on. GlovePIE allows one to program up to eight Wiimotes.
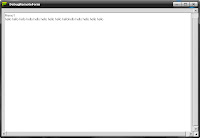
Running the following script allows us to output the text "hello " to an output window GlovePIE provides. To access the output window, on the toolbar select TroubleShooter -> Remote Test.

Notice that this script also allows us to use the backspace key by pressing the B-trigger on the Wiimote. The cursor can also be moved by pressing the corresponding button on the direction pad. On the output screen, the text "hello " is displayed every time the A-button on the Wiimote is pressed.


No comments:
Post a Comment